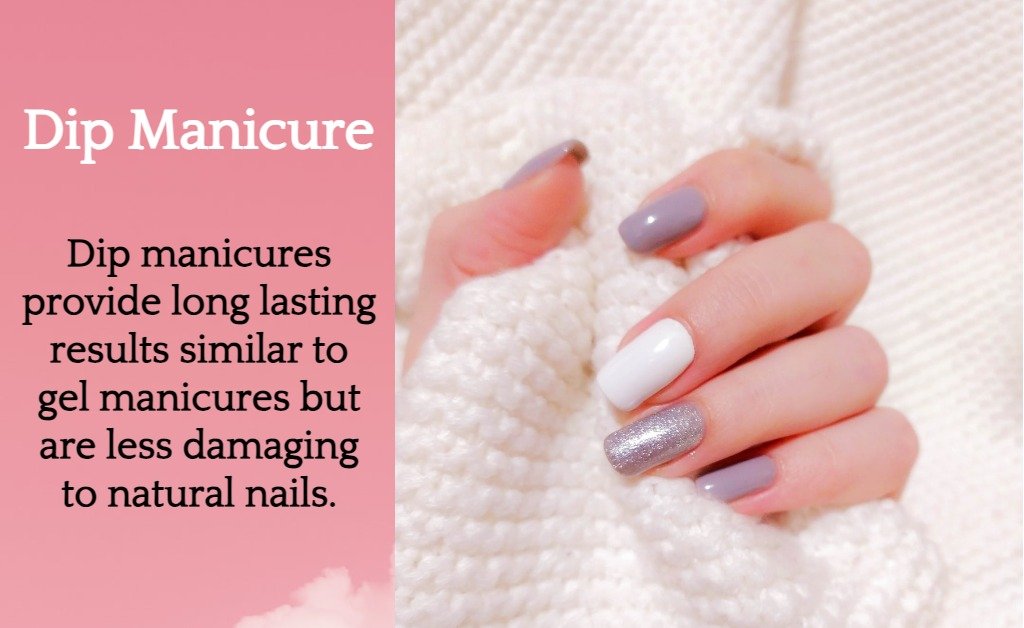
Dip manicure, also known as dip powder nails, is a type of nail enhancement that uses powdered pigments to create a smooth and durable finish on natural or enhanced nails. Unlike gel or acrylic nails, dip manicures do not require curing with UV or LED lights, which can save time and reduce exposure to harmful radiation. Dip manicures also have a more natural look and feel, and are less likely to damage the nail plate or cause lifting. Dip manicures can last up to a month without chipping, and offer a wide range of color choices and nail designs. Dip manicures are a great option for anyone who wants to have beautiful and healthy nails.

.
Tools and Materials Required
Several tools and materials are required for performing a dip manicure at home or in a salon. To perform a dip manicure at home or in a salon, you will need the following tools and materials:
- Cuticle tools: These include a cuticle pusher and a cuticle cutter, which are used to push back and trim the cuticles around the nails. This helps to create a clean and even nail surface for the powder application.
- Surface prep/dehydrator: This is a liquid that prepares the nails by removing any oils and dirt that might interfere with the powder adhesion. It is applied on the nail plate before the primer.
- Primer: This is a bonding agent that enhances the adhesion of the powder to the nail plate. It is applied after the dehydrator and before the first layer of powder.
- Colored pigment powders: These are the powders that give the nails their color and shine. They come in various shades and brands, and can be mixed and matched to create different effects. They are applied in thin layers using a brush or a stylus, and are activated by a top coat liquid.
- Top coat liquid: This is a clear liquid that seals and protects the powder layers. It gives the nails a glossy and smooth finish, and prevents chipping and cracking. It is applied after each layer of powder, and can be cured under a UV/LED lamp for faster drying.
- Stylus/dotting tool: This is a tool that has a pointed tip, which is used for precise application of powder and top coat on small areas, such as the edges or the tips of the nails. It can also be used to create nail art designs with different colors of powder.
- Orangewood stick: This is a wooden stick that has a flat end, which is used for pushing back the cuticles and cleaning the under-free edges of the nails. It can also be used to remove any excess powder or top coat from the skin or the nail surface.
- Acetone or nail polish remover: This is a liquid that dissolves the powder and the top coat, and is used for removing the dip manicure when needed. It can be applied with a cotton ball or a foil wrap, and left on the nails for 10 to 15 minutes.
Dip Powder Formulas, Application Techniques
Dip powders come in various formulas that are suited for different nail needs and preferences. The major types include:
- Hard/Firm Formula: Provide a very hard and durable finish. Best for those seeking maximum strength and wear time.
- Soft/Flexible Formula: Offer a softer and more flexible finish. Better suited for delicate natural nails or people who prefer a less rigid feel.
- Specialty formulas: Include glitters, charms, 3D/3C effects, and pour-on pigments that create dramatic nail art designs.
There are a few key application techniques involved in performing a dip manicure:
- Preparation: Cuticles are pushed back and nails are cleaned, prepped, and dehydrated.
- Application of primer: The bonding agent is brushed onto the nail plate.
- Dip and dust: Fingers are dipped into pigment powders which are then dusted off, leaving a thin layer adhered to the nail.
- Repeat dipping: The process is repeated 2-3 times for full opacity and color saturation.
- Top coat application: A layer of top coat liquid is brushed on to seal and protect the finish.
- Curing (for gel top coats): Lamps are used to cure any gel top coats applied.
- Filing and shaping: Any excess powder at cuticle lines or sides is filed away.
Proper application techniques help ensure the pigments fully adhere and provide maximum durability. Multiple thin coats work better than one thick layer.
Advantages of Dip Manicures
There are several advantages that have made dip manicures a popular nail treatment option:
- Longer lasting: With proper application and care, dip manicures can last up to 3-4 weeks which is longer than traditional polishes. Some reports even claim 6 weeks of wear.
- Low maintenance: Fills only require light filing and re-application of top coat every 2 weeks versus a full removal and re-application.
- Harder and more durable finish: Once cured, the pigments produce a very hard shell that protects nails from chips, breaks, or damage from routine tasks.
- Gentler on nails: Unlike acrylics or gels, dip pigments do not require nails to be filed down and thinned for application. So the natural nail structure remains intact.
- Wide variety of shades: Brands offer large palettes consisting of creams, glitters, charms, and unique textures to suit all styles.
- Repairable: Should chips or cracks occur, individual nails can be quickly fixed through filing and re-application instead of full removal.
- Budget-friendly: While upfront kit costs may be comparable to other enhancements, fills eliminate repeated polish purchases making it affordable in the long run.
These benefits have propelled dip manicures into a preferred mainstay treatment by clients and nail professionals alike. The convenience factor combined with natural-looking results has fueled their meteoric rise.
Dip Powder Application at Home
Many brands now offer affordable at-home dip manicure starter kits, making self-application very possible. Tips for a successful home application include:
- Prep work: Allow enough time and practice nail prep, dehydration, and layering pigments correctly for best adhesion.
- Clean environment: Have all tools organized and work in a dust-free space to avoid particles ruining the finish.
- Steady hands: Go slow, be patient, and steady your non-dominant hand resting on a table for polish application.
- Thin coats: Ensure each dip layer is very thin to prevent lumps or excess powder at cuticles/sides that are difficult to fix.
- Sealing layers: Properly apply and cure any top coat layers for protection and a salon-quality glossy look.
- Let it set: Allow coats to fully dry in between applications to avoid smudging or transferring of wet products.
- Use angled brushes: Small precision brushes make the application and cleanup of cuticles much easier.
- Watch tutorials: Referring to visual instruction guides can quickly improve home application skills.
- Seek a salon for fills: While the application is DIY, it’s best to visit a pro for perfect fill-ins every 2 weeks.
With the right products and techniques, dream nail looks are very achievable from the comfort of your home. Practice makes perfect.
Dip Manicure Removal and Maintenance
When dip manicures start looking worn or a new design is desired, here are the steps for removal:
Soak nails
Saturate nails in acetone or nail polish remover for 5-10 minutes to dissolve bonded powder layers.
Push back with a stick
Use an orangewood stick to gently push back any remaining particles from cuticles and sides.
Scrub gently
Very lightly scrub nails with a wooden stick, cotton pad, or brush dipped in acetone. Avoid filing or scratching the nail plate beneath.
Repeat soaking
Re-saturate if chunks remain and repeat scrubbing until all pigment is removed.
Moisturize cuticles
Once bare nails are revealed, apply cuticle cream or oil to replenish any moisture lost during the process.
For salon-quality maintenance, it’s best to see a professional every 2 weeks for re-application of a thin coat and glossy top seal. At-home light buffing and top coat touch-ups are also possible between full fills. Proper removal prevents product build-up that could damage natural nails over time if neglected.
Dip Manicure Risks and aftercare
While generally quite safe when applied professionally or at home with care, some risks do exist with dip powder nails that clients should be aware of:
- Allergic reactions: In rare cases, an individual may develop contact allergy or sensitivity to ingredients in pigments, primers, or glues over time. Doing a patch test is advised.
- Damage to natural nails: Frequent over-filing during fills to remove staining or adhered chunks could lead to nail thinning or breakage if done too aggressively by an amateur.
- Injury from shards: Should a full nail break off, remnants could potentially cut the skin like tiny shards of glass. Care must be taken with broken enhancements.
- Nail discoloration: Improper dip removal leaving remnants bonded to the nail bed may cause temporary or even permanent dark or yellow nail staining in some cases.
- Skin irritation: Frequent soaking in acetone without proper moisturizing carries a risk of drying or cracking cuticles or skin around nails long-term.
Some Dip Manicure Tips include:
- Take dip powder breaks every 6-8 weeks to let natural nails breathe and moisturize.
- Moisturize cuticles daily with creams or oils to counteract the drying effects of acetone.
- Wear gloves for tasks involving harsh chemicals to protect enhancements.
- Replace kits, pigments, and liquids before expiration to ensure product quality and performance.
- Seek professional help immediately if an allergic reaction like swelling or rash develops.
When applied and maintained properly with occasional breaks in between, dip nails can enhance beauty safely for many individuals when risks are understood.
Conclusion
Dip manicure, or dip powder nails, is a nail enhancement technique that offers many benefits over other alternatives. Dip manicures are easy to apply, long-lasting, gentle on natural nails, and affordable. They also provide a variety of color options and nail designs to suit different preferences and occasions. Dip manicures can be done at home or in a salon, using proper tools and materials. To maintain the health and beauty of the nails, dip manicures should be applied and removed correctly, following the recommended steps and precautions. Dip manicures are a great way to enjoy stunning and durable nail finishes without compromising the nail plate underneath.
FAQs
What is a dip manicure?
A dip manicure, also known as dip powder nails, is a nail enhancement method where powdered pigments are applied to natural or enhanced nails using a liquid bonding agent. The powders adhere to the nail to strengthen and beautify them while lasting for several weeks.
Is a dip manicure good for your nails?
Yes, dip manicures are generally better for natural nails than other options like acrylics since they do not require thin filing of the nail plate. As long as the nail is not over-filed during fills and moisturizer is used, dip manicures allow the natural nail to breathe while gaining protection from a polish finish.
What is dip vs regular manicure?
A regular manicure simply involves filing, shaping, cuticle care, and polish application. A dip manicure is a longer-lasting enhancement method where colorful powders are bonded to the nail for added strength, protection, and style compared to polish alone.
What are the pros and cons of dip nails?
Some pros include long wear time, low maintenance, and durability while keeping the natural nail intact. Cons can be potential nail staining if not removed properly, risk of breakages, and cost of refills every 2-3 weeks.
Is dip better for short nails?
Yes, dip manicures are often preferred for short nails since they don’t require the nail plate to be filed down and thinned. This makes dip gentler on short, fragile nails compared to other options that weaken the natural nail structure.
How much is a dip manicure?
The cost of a standard dip manicure performed at a professional nail salon usually ranges from $25-45, depending on location. At-home dip kits with supplies for multiple manicures can cost $30-60. Refill appointments tend to be $15-25.
Do dip nails get filled?
Yes, after 2 to 3 weeks when the dip manicure starts wearing down, clients return to the nail tech for a light filing, buffing, and re-application of the top coat – referred to as a “fill”. Multiple thin layers maintain the color and protection between full removals.
Discover more from Beauty Fashion Palace
Subscribe to get the latest posts sent to your email.


